

How can you make sure your quilt looks great once it’s been quilted? Longarm quilting secures the multiple layers of a quilt together with a strong, decorative design. This step is technically what makes a quilt top into a quilt! There are few things more exciting than seeing the quilt top you worked so hard to piece come back as a finished quilt. But some factors can affect the quality of the final product. Here we’ll look at two things you can do to make sure your quilt looks amazing after longarming!
Incorrectly sized borders are the single most common cause of quilts ending up out of square or with gathers & tucks.
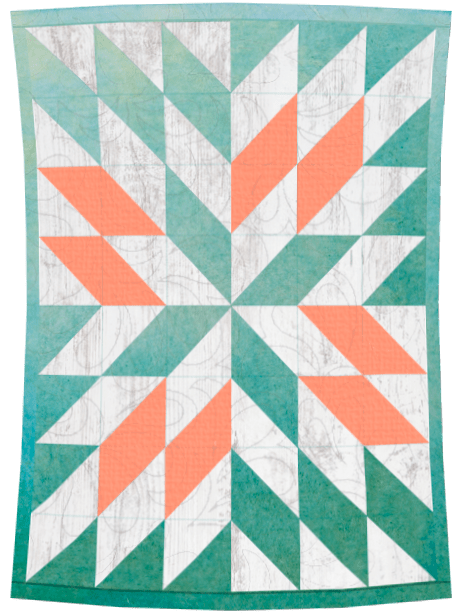 Incorrectly sized borders lead to a warped finished quilt
Let’s first look at some of the most common ways that borders can end up the wrong size:
The problem with the first method is that it doesn’t use the actual size of your quilt top. In a perfect world, our quilt tops would be dead on with what the pattern claims they should be, but this is rarely the case. This doesn’t make you a bad quilter, it just means that there’s always variance in a handmade item. On top of it, patterns frequently have math errors!
The second and third methods seem like they should give you a correctly sized border. However, a raw fabric edge is prone to stretching, gathering, or just not lying straight and flat, so using the edge as your guide will generally give you an inaccurate measurement. The third method above will give you a different, inaccurate length for each side, which really adds to the problem!
So how should you determine your border sizes? It’s simple! For all 4 sides, measure along the nearest seam line to the edge in question. Seams are sturdier and more consistent in their length than raw edges.
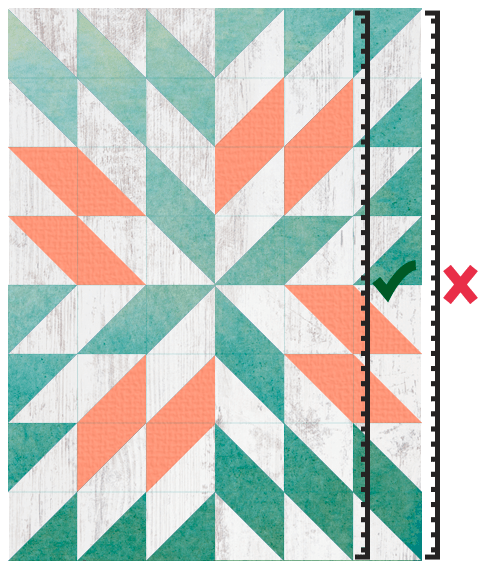 Seams are more trustworthy than edges. Measure them to determine your border length!
Attach your first pair of shorter borders, and then measure along the other seams for your longer pair. Don’t trust any pattern or math, only your measurements.
If a quilt is meant to be square but all four sides are slightly different, then all the borders should still be cut different sizes. You cannot change the length of fabric by piecing onto it without the excess going somewhere else!
Once you have a quilt top ready to be machine quilted, it needs a backing. One option is to let us provide fabric for the backing, and you won’t need to measure, cut or sew the backing. If you do want to use your own fabric, it’s important to follow these tips to get the size right:
Measure
You have to measure the quilt top. It's very tempting to think, “Well, this is the size the math says the quilt top should be,” and to cut your backing based on that. Don’t give in to this temptation!
From these measurements, add 8” to each dimension.
For example, if your quilt top measured 80” x 90”, then your backing should be at least 88” x 98.”
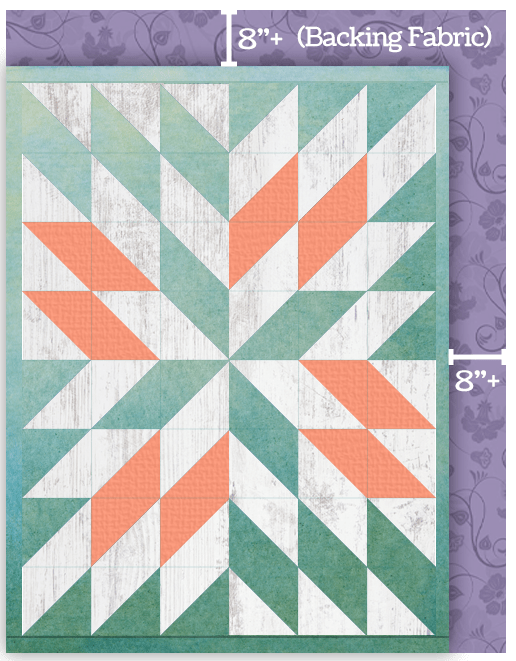 Add 8″ to each dimension of your quilt top. That’s how big your backing fabric should be
Attach your first pair of shorter borders, and then measure along the other seam for your longer pair. Don’t trust any pattern or math, only your measurements.
It also never hurts to lay your quilt top over your backing fabric afterwards to double check that the backing is the correct size.
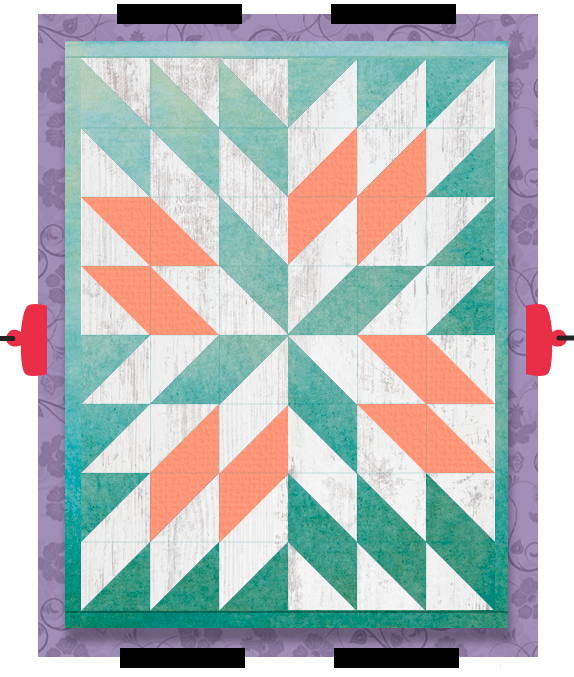
When a quilt is loaded onto a longarm sewing machine, the backing fabric is secured onto the machine at the top and bottom and then held at the appropriate tension by side clamps. These clamps need the extra fabric so that they have something to hold onto.
While it’s a must to have at least 8” of excess fabric on each dimension, there’s no need to have backing much larger than this. Fabric is expensive, and your quilt top doesn’t need a circus tent!
Square the backing fabric
It’s important that you cut your backing fabric to be fairly square. In this case, square just means that the edges are at right angles to one another; your quilt top and its backing might be a rectangle, not a literal square.
 When your backing isn’t cut square, the total usable area of your fabric is smaller and can lead to problems. We see this all the time
Wonkiness in the backing fabric makes the total useful area smaller than it should be (as shown in the illustration; we see this often), and can lead to other problems during the longarming process, such as gathers and folds.
One thing we recommend to help keep your fabric square is to rip it instead of cutting it. Knick the selvage with scissors or a rotary cutter and then tear. This gives you a relatively straight cut, even if the fabric is wrinkled. If you’re using extra wide fabric, which is usually very wrinkled, this method is essential.
And that’s it! While there are other little things you can do to prepare your quilt for longarming, these are the two most common and problematic issues we see. If you get the border and backing right, your quilt top will longarm beautifully!